Linked Cube Views: Part 2 – Turing Your Linked Cube Views into a Dashboard
If you read part 1 you will already have your Cube Views set up and ready to go. If not here is a quick recap. We are turning two linked Cube Views into a basic dashboard that allows users to view both Cube Views and interact with them on the same Dashboard page. We have two Cube Views:
Balance Sheet Report (or any Cube View of your choice):
Drill Down Cube View which is passed Bound Parameters in from the Balance Sheet Report (for more details on set up refer to Part 1).
If you decide to go back to Part 1 to set up your Cube Views I will wait for you, if not let’s move on to the build!
The Dashboard Build:
Navigate to Application Dashboards. We are going to use the following components:
- 5 Dashboards
- 2 Cube View Components
- 1 Parameter
- 2 Combo Boxes
Dashboards:
We will start by creating a few dashboards. When creating dashboards, I like to use a numeric/alpha combination. The Top Dashboard will be 00 followed by a brief description. We will create the following five:
- 00_LinkedCV
- 01_LinkedCV_Navigation
- 02_LinkedCV_Body
- 02a_LinkedCV_Body_Click
- 02b_LinkedCV_Body_Drill
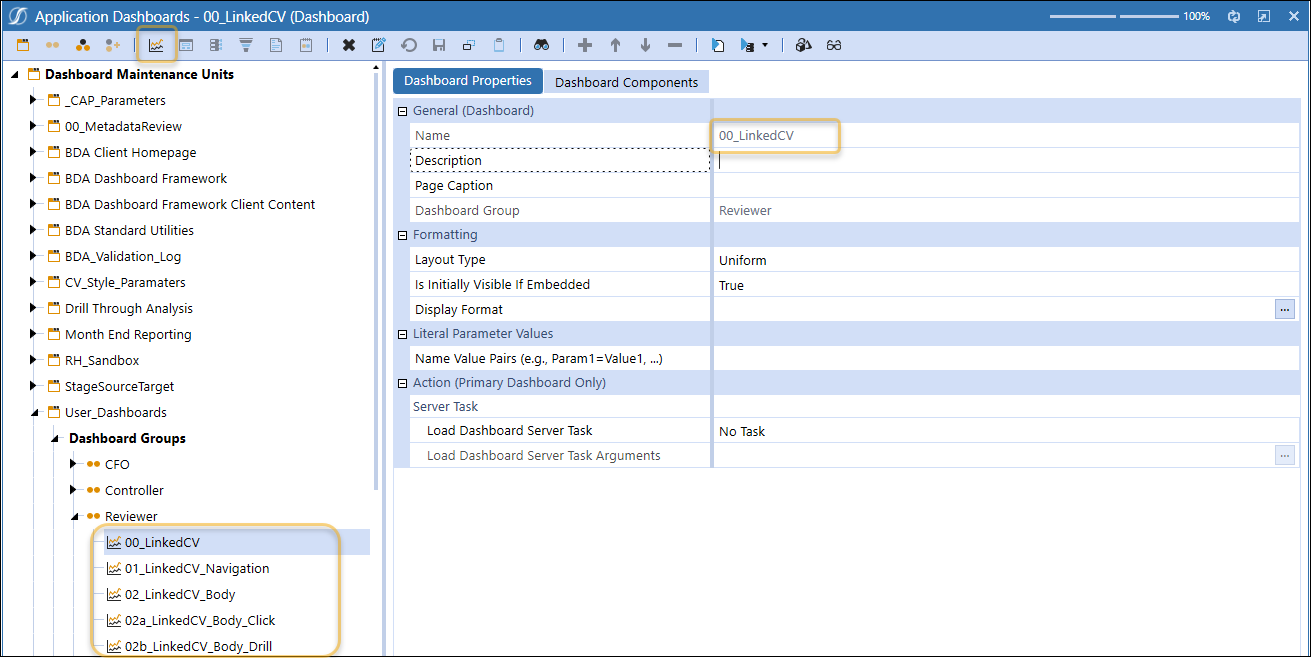
Create a new Dashboard by clicking the ‘Create Dashboard’ button below, naming your item and saving.
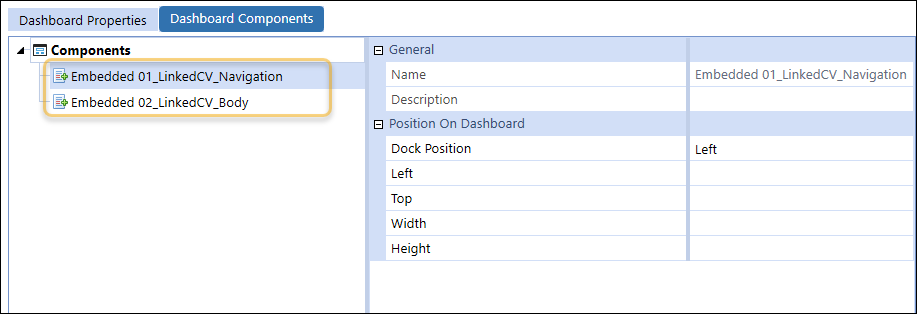
We will assign our Navigation (01) and Body (02) dashboard to our Top (00) dashboard. When you create a new Dashboard an Embedded Dashboard component automatically is created. This allows you to embed the dashboard within other dashboards like we do in this example. Navigate to the Dashboard Components Tab and use the ‘Add Dashboard Components’ button to select the items you are adding then save.
Cube View Components:
We will need to set up two Cube View Components, one for each of our Cube Views. To do this add a component and select your Cube Views.
On the main Cube View we will also need to update the User Interface Action. We want this to refresh the Dashboard that will contain the Drill Cube View we just created. This will be 02_LinkedCV_Body_Drill
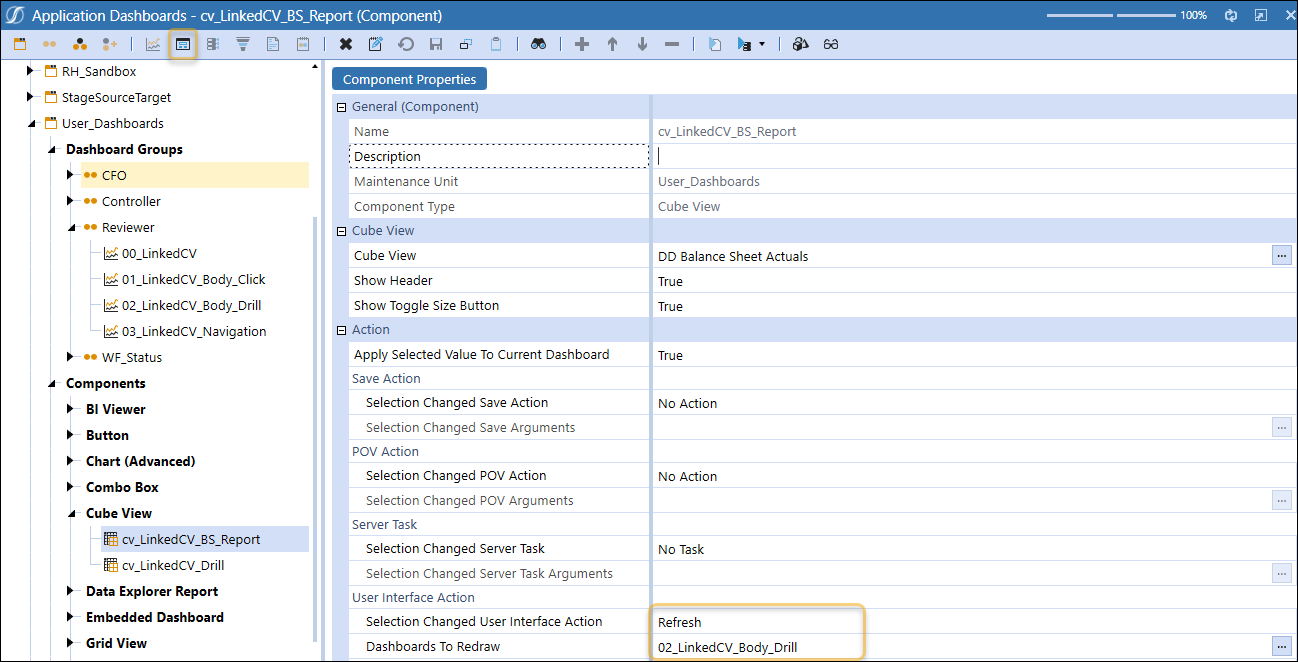
Note, you could put both Cube Views on the same Dashboard Component rather than splitting as we did above but then we would need to refresh all the components, this allows us to only refresh the relevant item which improves performance.
Parameter:
We will create a time Parameter which we will then attach to a Combo Box to allow users to select the time from their dashboard. If this is going to be attached to a Workflow you could reference WF time in the Cube View and a Combo Box would not be needed.
You will need to click on Parameters in the Dashboard Maintenance Unit panel for the Parameter button to light up, then you can create, name, and set your parameter. Note that the Parameter Type Member Dialog is not compatible with a Combo Box, so I have selected Member List.
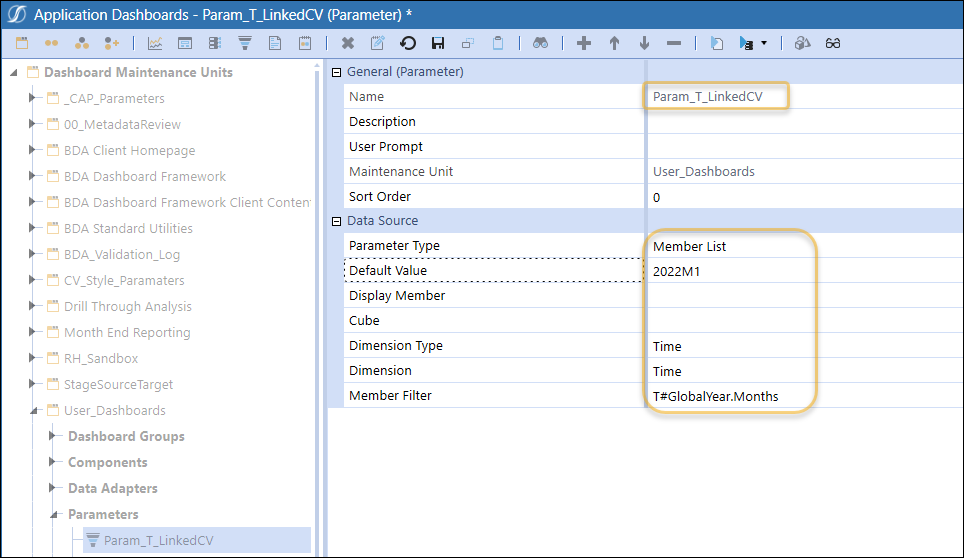
Additionally, you will need to go back to your Cube View and add this Parameter to your Time column.
Combo Box:
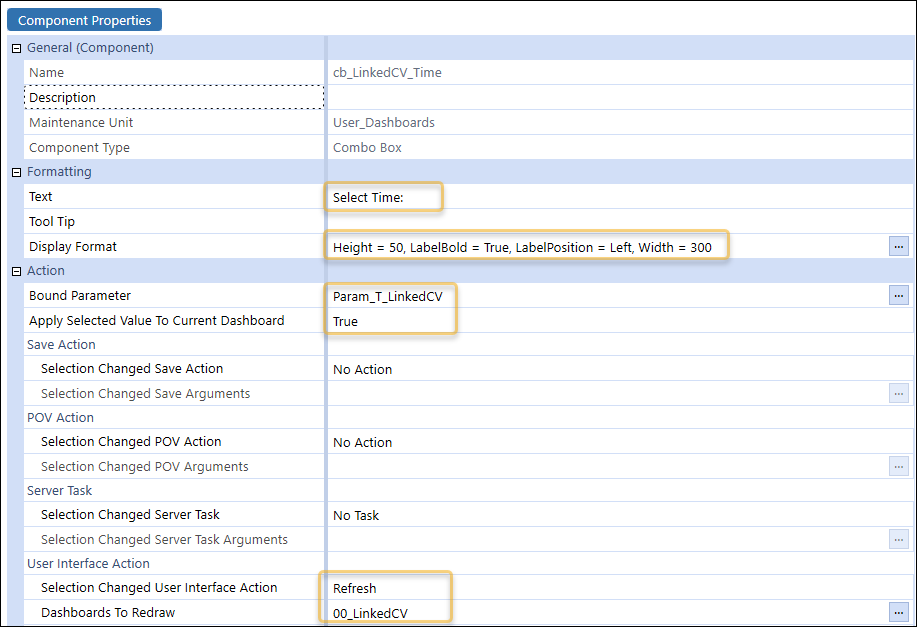
Create a Combo Box Component. Set your Text to give users a Prompt, add your Display Format (basic formatting below to control size, feel free to change or add more), attach the Parameter you just created, and update the User Interface Action to refresh our entire dashboard this time.
Dashboards (again):
Now that we have all our Components set up, we will attach them to our Dashboards and format them. Let us start from the bottom here:
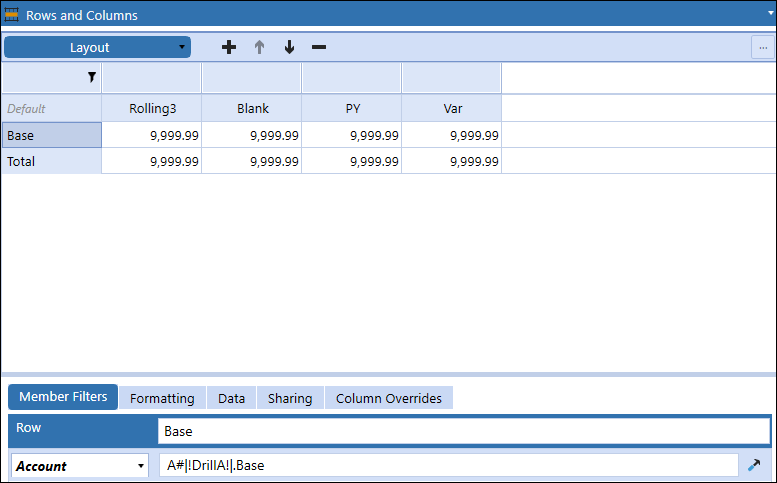
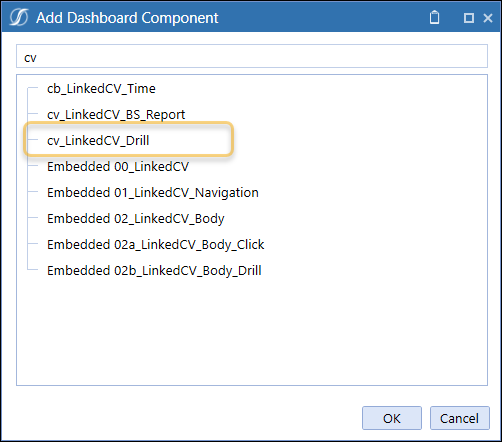
02b_LinkedCV_Body_Drill: Add your CV_LinkedCV_Drill Component, when you add your component search for ‘CV’ to limit your results, this is a benefit of using a consistent naming convention.
02a_LinkedCV_Body_Click: Add your CV_LinkedCV_BS_Report
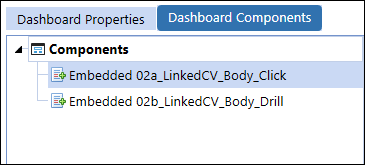
02_LinkedCV_Body: Add both Embedded Dashboards with Cube Views on the Dashboard Components tab
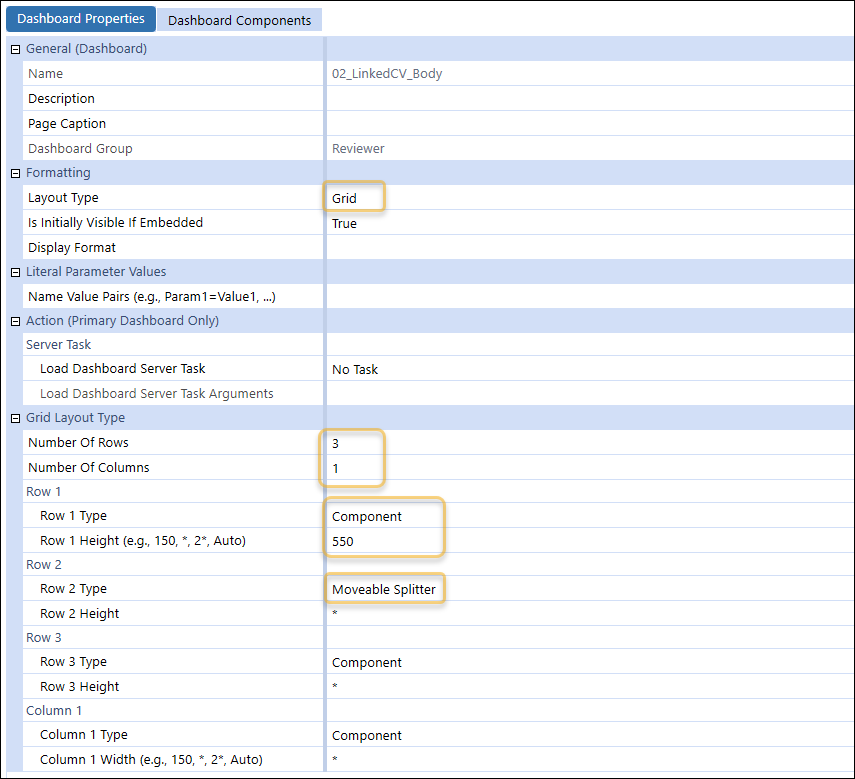
On the Dashboard Properties tab update your Layout Type to Grid and set to 3 rows and 1 column. We will change the Height of our first row to 550 and change our second row to be a Movable Splitter. This will allow users to toggle the space each Cube View is taking up.
01_LinkedCV_Navigation: Attach your Combo Box component here.
00_LinkedCV: We already attached our Embedded dashboards in an earlier step, the last thing here is to format the dashboard. We will also set this one to be a Grid with 2 Rows and 1 Column. Make your first Row Component a height of 75. We will leave the second at *. The last step is to name your Top Dashboard by entering a header in the Description line. I will call mine Balance Sheet Drill.
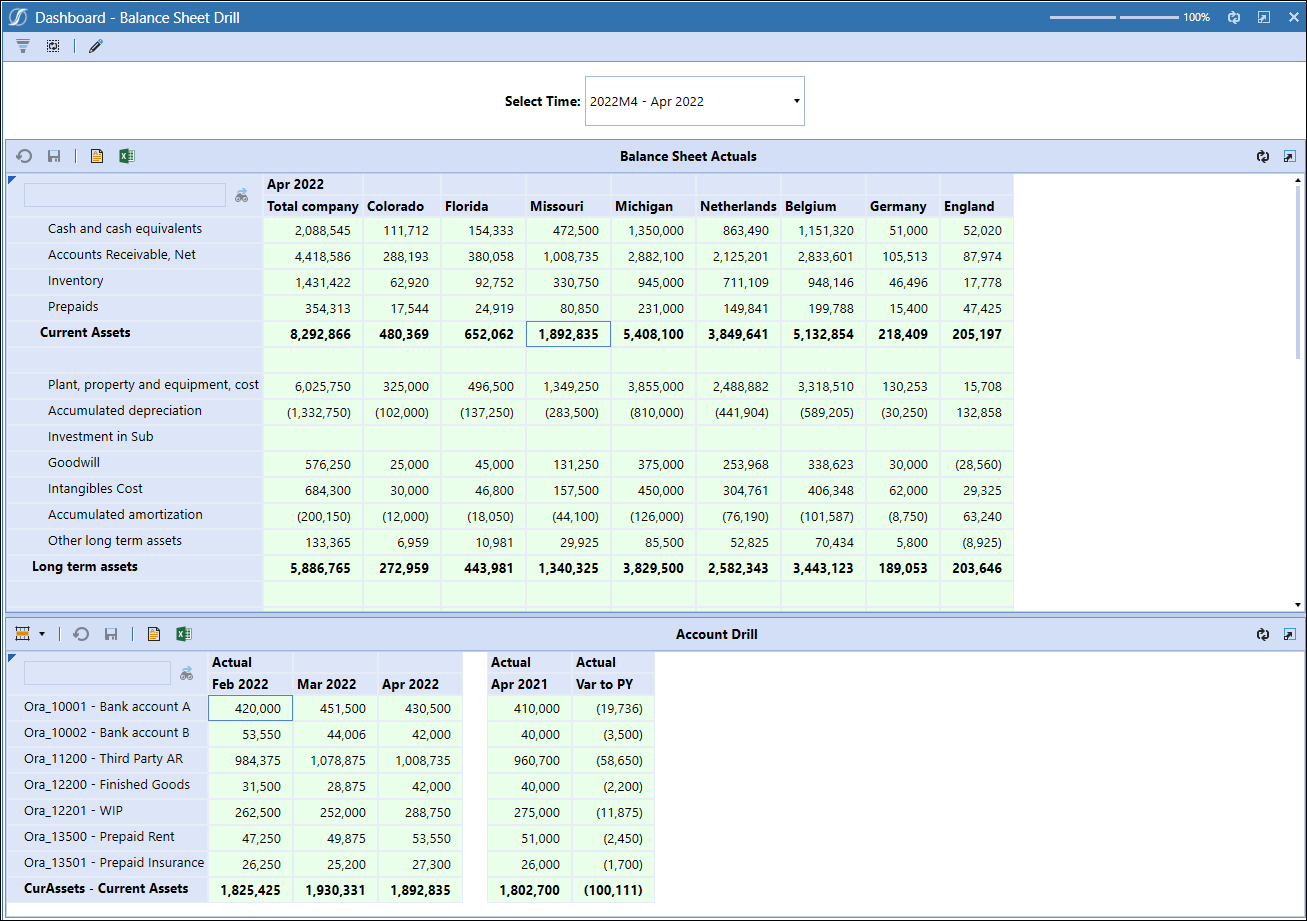
Run your Dashboard:
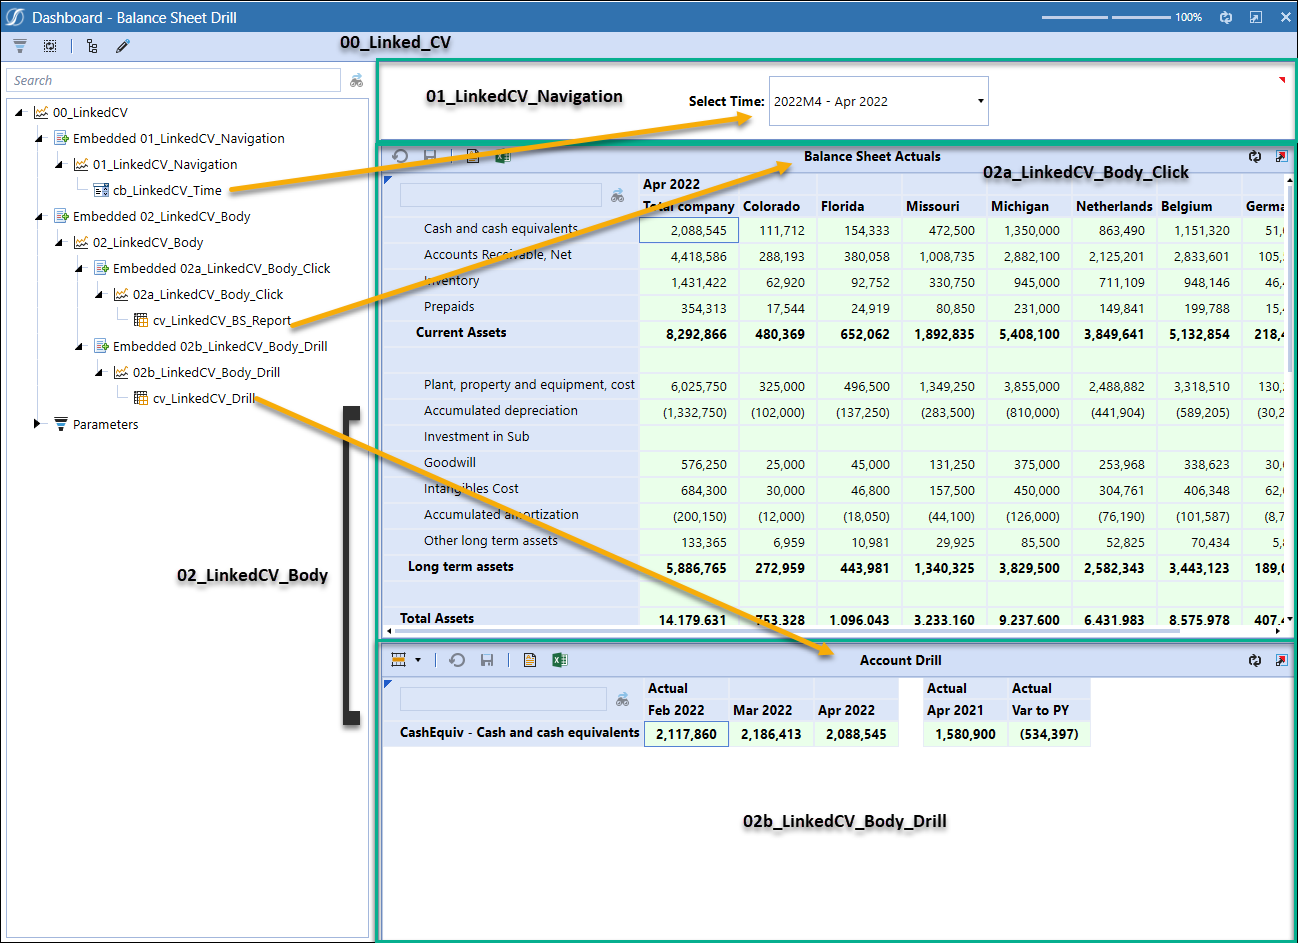
Now click the View Dashboard button (note you can do this on any individual dashboard to review along the way as you are building). If this is your first time working with Dashboards, Congrats! You have created an interactive user interface!
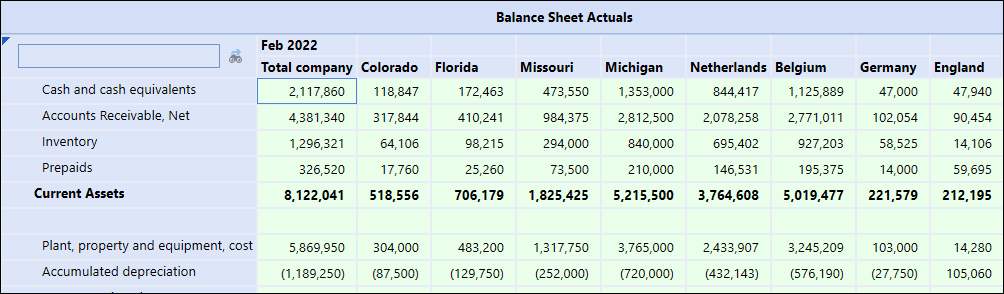
Click anywhere in your top Cube View and your bottom panel will update with results.
From here you can add additional Combo Box Options, formatting enhancements, or create additional Linked Cube Views for your users! Don’t be afraid to play with different settings on your Components. One thing I like to do is open two instances of the application so I can make setting changes on one screen and refresh and review on the other.
For a summary of component make up see below: