
In Part 1, we focused on the real world problems Confirmation Rules are designed to catch. Late entries. “Clean” closes that aren’t actually clean. Data that exists but breaks financial logic.
Confirmation Rules direct the system to ask the questions someone always ends up asking later.
They don’t replace judgment or review. They take the checks finance teams already perform manually and embed them directly into the close, turning “I always double check this” into “the system won’t let us move forward unless this makes sense.”
This post moves from philosophy to execution.
We’ll walk through how to build a Confirmation Rule in OneStream, where the rules live, how the key settings work, and how to attach them to the workflow so they protect the close without slowing teams down.
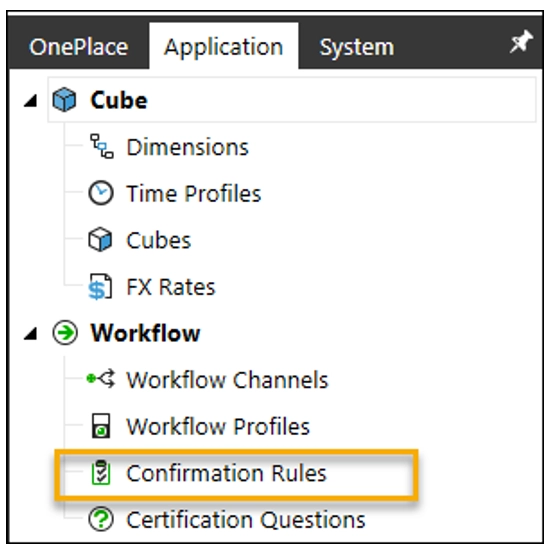
Navigating to Confirmation Rules in OneStream
Confirmation Rules are maintained at the Application level. Access typically requires administrator or power user access. Once inside the Confirmation Rules area, you’ll see a list of existing rules.
Anatomy of a Confirmation Rule: Key Settings Explained
Before writing any logic, it is important to understand the configuration options available. Many Confirmation Rule issues don’t come from bad logic, they come from misconfigured settings.
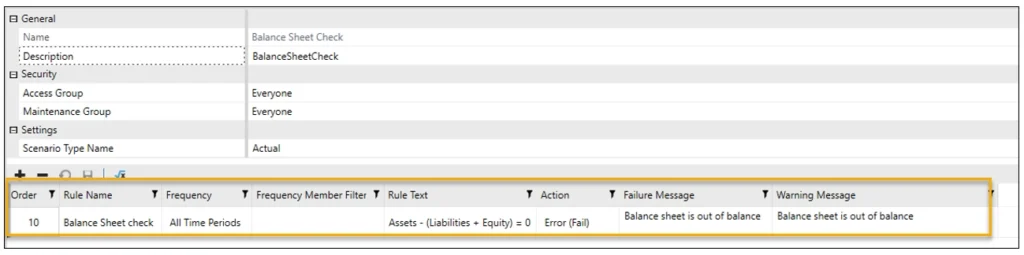
Rule Name and Order
This is where you set your rule name and the order it runs in. The name should clearly describe what the rule is checking. If someone scans the list of rules, they should immediately understand the purpose without opening it.
Frequency and Frequency Member Filter
Frequency determines when the rule runs. Out of the box OneStream provides the standard options of All Time Periods, Monthly, Quarterly, Half Yearly, and Yearly.
If those options don’t meet your needs, you can set the frequency to Member Filter. The Frequency Member Filter then allows you to control which time periods the rule applies to. This is especially useful when a rule is only relevant for specific periods, such as year end or first period checks.
Rule Text
Rule Text is the description users see in the Workflow. This should explain what the rule is validating and expand on the rule name in plain language.
Think of this as the “why” behind the check. A user should be able to read this and understand what the system is evaluating without needing to review the formula itself.

Action: Fail vs Warning
This is where you set if the rule will cause a Fail which will stop users from moving forward within the Workflow or a Warning which alerts users but does not stop them from moving forward.
Failure and Warning Messages
This is where you set the message the users will view if a Failure or Warning occurs.
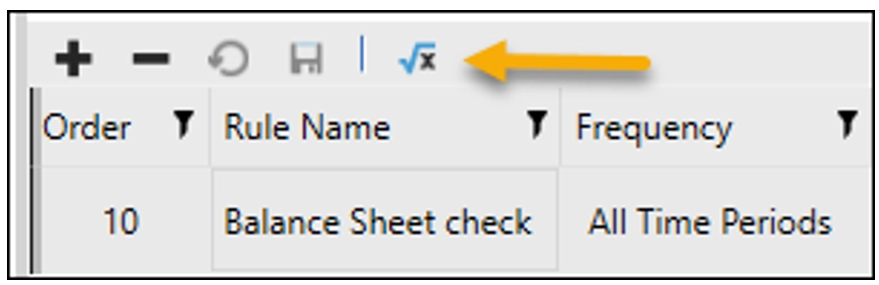
Opening and Editing a Confirmation Rule
To view the logic behind the rule, click the rule you want to view and select the Edit Rule Formulas button.
Below is a very basic example of a Confirmation Rule. Simple, but important. This Balance Sheet Integrity check highlights the core components you’ll see in most Confirmation Rules.
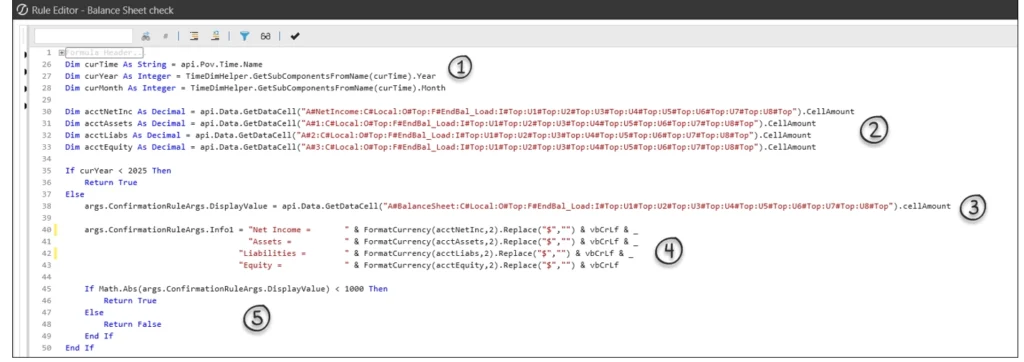
- Defining Variables and Context
The rule starts by defining the variables it needs to operate. This includes metadata values or text fields and any other parameters required to control when and how the rule runs. - Pulling Specific Account Balances
The rule retrieves the specific account balances it needs, either to evaluate the logic or to provide meaningful information back to the user. - Defining the Value Being Tested
This is the core of the rule. The DisplayValue is the numeric result OneStream evaluates to determine whether the rule passes or fails. - User Facing Information
This is where user facing information is defined. Instead of simply indicating that a rule failed, this section gives users context and a starting point for what to review.
In this example, we are using Info1. OneStream allows up to four information fields (Info1–Info4), which can be used to provide additional details when helpful. - Pass / Fail Logic
Finally, the rule defines the pass/fail logic and tolerance. In this example, a tolerance of 1,000 is used. The absolute value ensures the rule allows for a variance of up to 1,000 in either direction.
Attaching Confirmation Rules to the Workflow
A Confirmation Rule doesn’t protect anything until it’s attached to a Workflow Profile. Like everything in OneStream Groups get assigned to Profiles and Profiles get attached throughout the Application.
To assign Confirmation Rules to the Workflow navigate to the Workflow you intend the rules to run on and select the Profile.
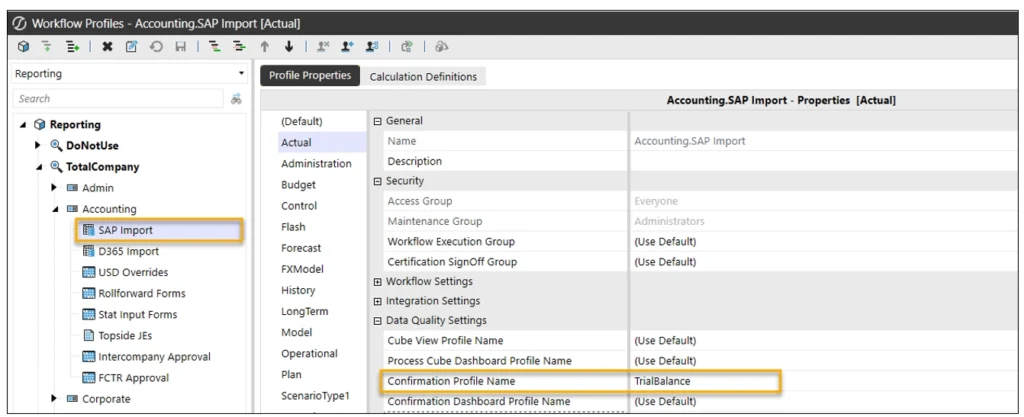
Now users will be able to see the checks on this Workflow step.
Running Confirmation Rules During the Close
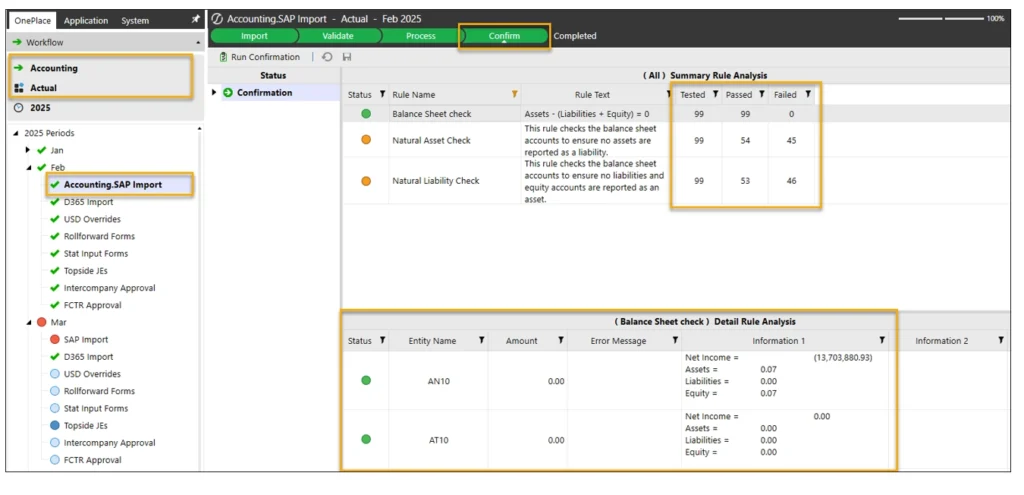
As you can see below, now when I run my Import step on the SAP Import Workflow I set up above I can see the rules that are in the Profile I attached. This will default to run for all entities in the Workflow. I can see how many entities were tested and how many passed and failed each rule.
If I click on the rule I can see the entities, amount out of balance, and the information that I set up my confirmation rule to supply.
What’s Next
In Part 3, we’ll wrap up by covering the subtle settings and implementation tricks that make or break Confirmation Rules in practice. We’ll look at using Confirmed switch values, enforcing consolidation before validation, handling near zero tolerances, centralizing rules at the parent workflow, skipping historical periods, and when it makes sense to use SQL inside a Confirmation Rule.
These are small things that I learned the hard way.